OpenVMS in WSL
Explore how to run OpenVMS directly on your Windows desktop with the VMS-XDE environment inside WSL. This tutorial covers the entire process from signing up and installing VMS-XDE to configuring a custom Windows Terminal profile for quick and easy access to your OpenVMS instance.
Overview
In our previous post about OpenVMS, we covered how to get OpenVMS running on Proxmox using the free Community License from VMS Software Inc. (VSI). This time, I wanted to explore running OpenVMS in Windows Subsystem for Linux (WSL). Technically, the "VMS-XDE" (Cross-Development Environment) is really just most of OpenVMS compiled to run on Linux. So, this will run on an x86-64 Linux environment, I'm just covering the WSL aspect since it's super easy to set up on a Windows 10/11 machine.

TL;DR
TL;DR: This post provides a step-by-step guide to running OpenVMS on Windows using the VMS-XDE environment within WSL. Learn how to sign up, install the software, and configure Windows Terminal for a seamless one-click launch experience.
![]()
In modern day, OpenVMS is owned and supported by VMS Software Inc. (VSI), which continues to develop and maintain the operating system. VSI has made OpenVMS available on x86-64 hardware, which means it can run on modern servers and virtualization platforms. Their latest offering is this VMS-XDE release, which runs sort of like a subsystem on top of Linux. You launch it by running a command from the Bash terminal.
Sign Up for VMS-XDE
To get started, you need to sign up for the free beta here:
When approved, you will receive an e-mail with the download link and supporting documentation. This is just a single ~700mb download of a .run file, which is a self-extracting archive.
Installation Steps
As discussed, download the .run file from the link provided in the e-mail that you got, once approved from VSI. What I did was put that file in an ~/vms-xde/ directory in my WSL home folder. If you need to get your files from Windows to WSL, you can either navigate to the WSL filesystem from Windows Explorer (e.g. \\wsl$\Ubuntu\home\<your-username>\vms-xde\), or you can copy the file using the WSL terminal like this:
1
2
3
4
5
6
7
8
9
10
11
# Make the destination directory on the WSL side
mkdir -p ~/vms-xde/

# Copy the .run file from Windows Downloads to the WSL directory
cp /mnt/c/Users/<your-windows-username>/Downloads/vms-xde-<version>.run ~/vms-xde/

# Change to that directory
cd ~/vms-xde/

# Make the .run file executable
chmod +x vms-xde-<version>.run
Then, to "install" VMS-XDE, you just run the .run file:
1
./vms-xde-<version>.run
It doesn't really install anything from what I can tell, it just extracts all of the files into a VMS-XDE subfolder. This takes about a minute. Then, to run OpenVMS, you just need to change into that directory and run the run.sh script:
1
2
3
4
5
# Change into the VMS-XDE directory
cd VMS-XDE/

# Run OpenVMS
./run.sh
The first time you run this it will automatically generate a new user in the UAF which matches your WSL username.
The second time you run it, you will be presented with the OpenVMS login prompt:
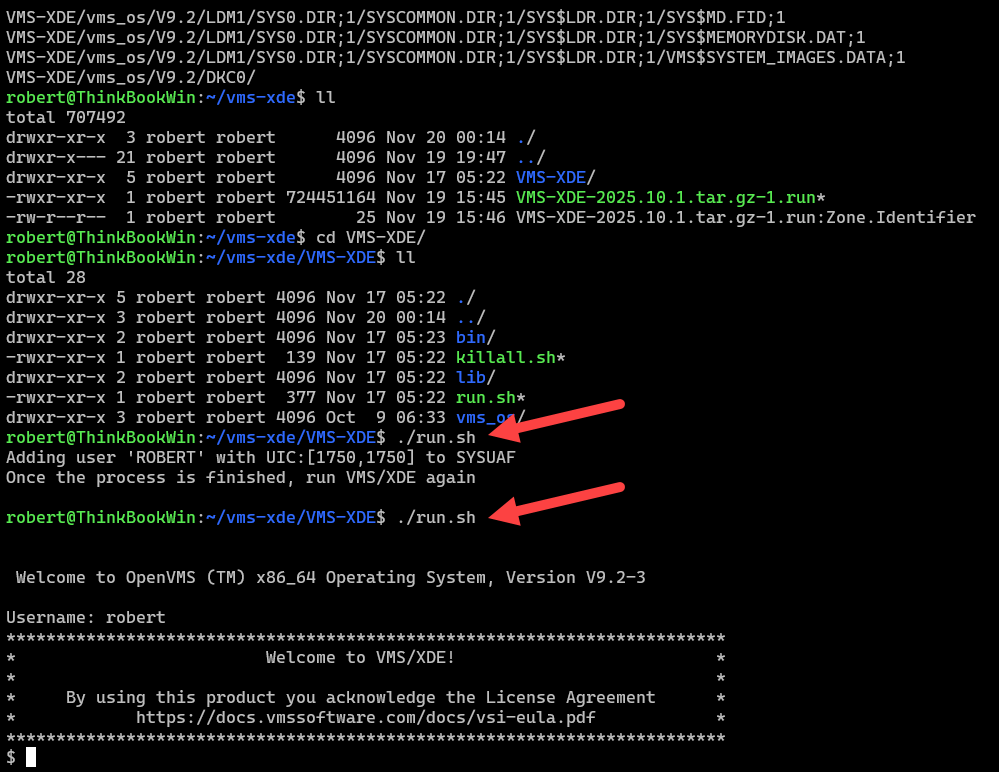
At this point, you are up and running OpenVMS in WSL!
Configuring Windows Terminal
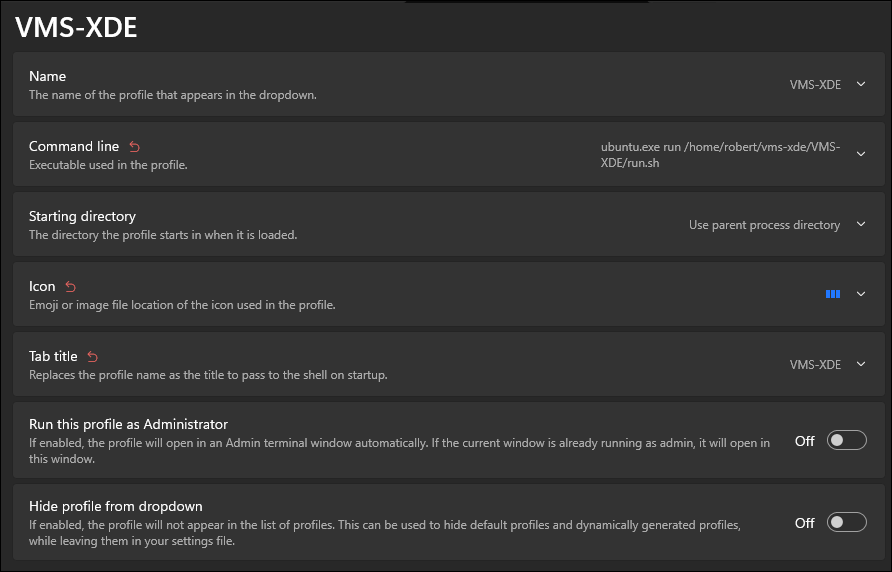
Now, to add some fit-and-finish to this setup, it would be create if we could just pop open a new VMS terminal like we can with PowerShell, WSL, or cloud shells. We can do this by adding a new profile to Windows Terminal. To do this, open Windows Terminal and go to Settings (the gear icon). Then, click on Add a new profile. Choose New empty profile. Then, fill out the fields as follows:
- Name: VMS-XDE
- Command line:
wsl -d ubuntu -- /home/<your-username>/vms-xde/VMS-XDE/run.sh - Starting directory: Leave blank
- Icon: You can download the icon here (right-click, Save As), store it in
\\wsl.localhost\Ubuntu\home\<your-username>\vms-xde\vms-logo.png, and then set the path to that file, using that exact path.
Then, click Save.
Breaking Down the WSL Command
Above, what this "Command Line" is doing is basically starting WSL, with the
-d ubuntudistribution (runwsl --listto see installed distributions), and then the--indicates that the rest of the command is to be run inside that WSL distribution. Finally, we provide the full path to therun.shscript that starts OpenVMS.
Your new profile should look something like this:
One other small thing that helps is under "Terminal Emulation" in that Windows Terminal profile, enable the option to "Suppress title changes". This prevents OpenVMS from changing the terminal title to something like "Ubuntu" every time you launch it.
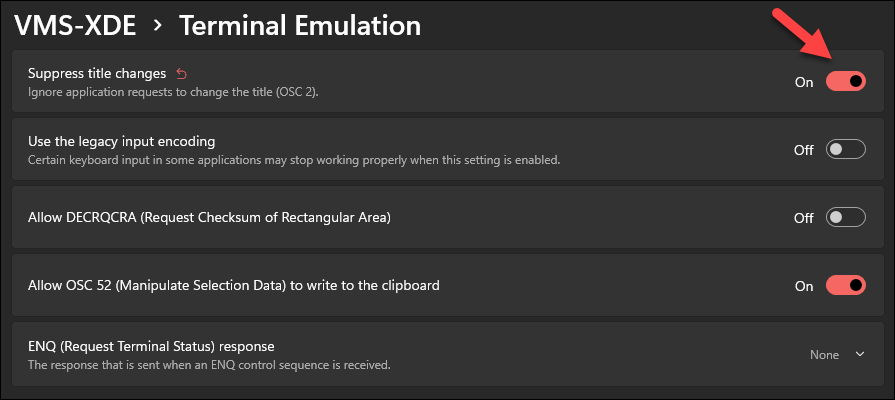
This is because we're technically just running a program in Ubuntu WSL! With that option enabled, the title on the terminal tab will just stay as "VMS-XDE".
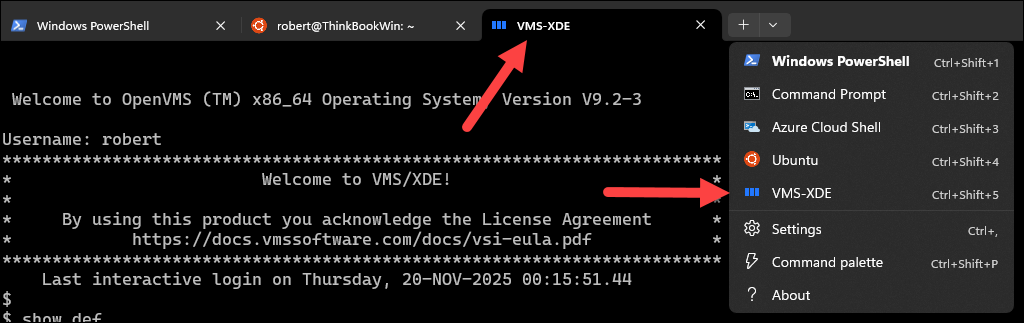
Now, when you want to launch OpenVMS, you can just open Windows Terminal and select the "VMS-XDE" profile from the dropdown menu. This will open a new tab and automatically start OpenVMS for you.
Moving Files Between Windows and Linux
In the WSL world, you basically have two-way access between the outer Windows host and the inner WSL Linux guest.
- From WSL: you can access your Windows files under the
/mnt/c/directory (for the C: drive),/mnt/d/(for D: drive), etc.- From Windows: you can access your WSL files by navigating to
\\wsl$\<distro-name>\home\<your-username>\in Windows Explorer.
Next Steps
If you are new to OpenVMS or if it's been a while, I wrote up a bunch of commands to run over in the original post about running OpenVMS on Proxmox.
Documentation
The official documentation for OpenVMS is available on the VSI website. You can find it here:
For System Commands, start with the "Base OS" section on the left-hand navigation.