Self-Hosted Domain Email Part 3: Domain Configuration and Management
Learn how to add and manage multiple domains in your self-hosted Mailu email server. This practical guide walks you through DNS configuration, user setup, and catch-all addresses, completing your journey to email independence and significant cost savings across your domain portfolio.
Overview
Welcome to the third and final part of our self-hosted domain email series! In Part 1, we explored why email self-hosting is challenging despite its age. In Part 2, we set up and secured our Mailu server. Now it's time to reap the rewards of our hard work - configuring actual domains and creating email addresses.
This is where the real value of our setup becomes apparent. Remember that typical email hosting costs about $5 per month per user, per domain. With our solution, we can add as many domains and email addresses as we want, limited only by our server's resources. For someone with 10+ domains like me, this translates to potentially hundreds of dollars saved annually.
In this guide I'll walk you through adding domains to your Mailu server, configuring the required DNS records for each domain, setting up users, creating catch-all addresses, and configuring your email clients. By the end of this post, you'll have a fully functional multi-domain email server that you control completely.
Compared to the rest of this setup in the first 2 Parts, this will be an absolute breeze!
TL;DR
In this final part of the series, I'll cover how to add domains to your Mailu server, configure the necessary DNS records, create users, set up catch-all addresses, and configuring email clients. You'll see how to manage all your domains from a single admin interface, giving you complete control over your email while saving significant costs compared to commercial providers.
Adding a Domain to Mailu
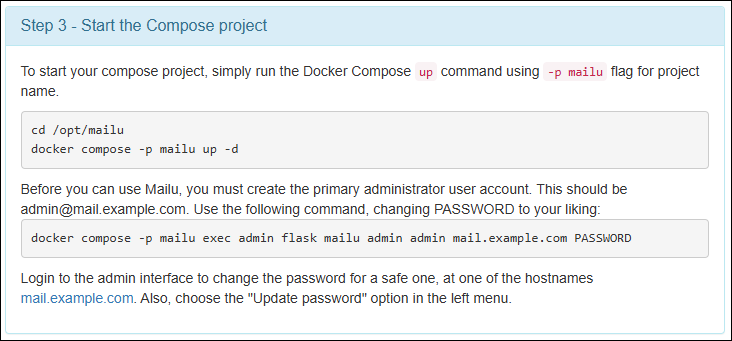
I'll assume you were able to create an admin user. Back in Part 2, we created an admin user. You might remember that the Mailu Setup website gave you instructions like this - but you would change your domain name and potentially your admin user name:
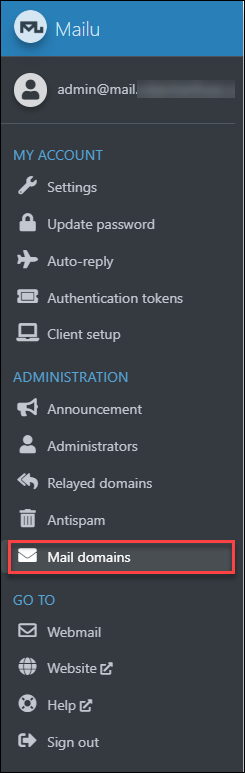
Once logged in as the admin, in the left-side navigation, click on "Mail domains", that's where it all starts:
Then you click "New Domain" in the top right:
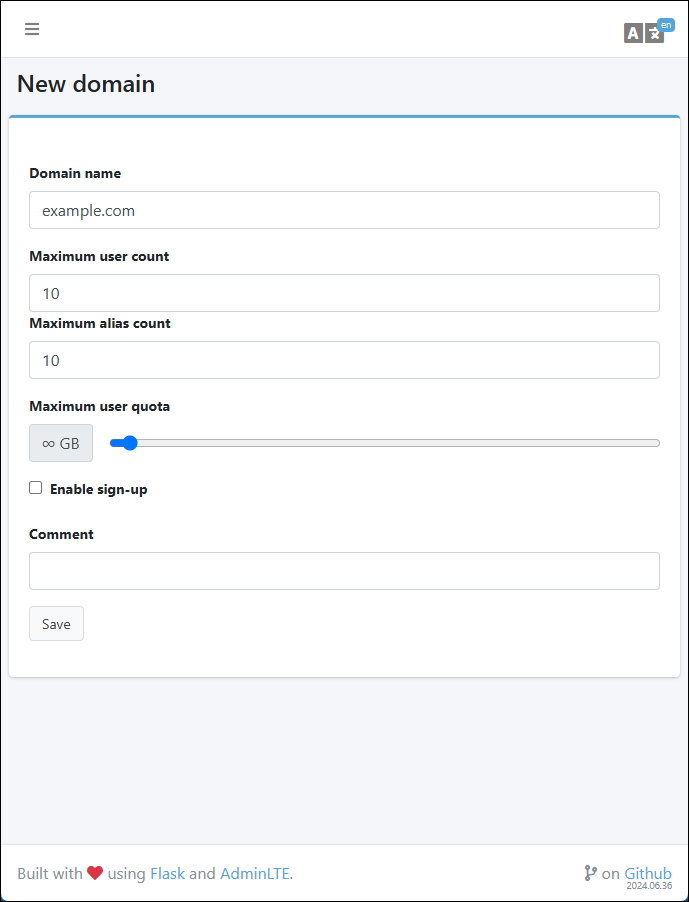
Unless you are doing something special, you can just put in the main part of the domain name where you want to add mailboxes (e.g. example.com) and leave everything else as the defaults.
Configuring DNS Records
With a mail domain created, if you go back to the "Mail Domains" page, click the Details button of your newly-created domain to see the DNS information:

From this screen you can generate your keys and the export all of the DNS settings that you need for email into a proper Bind format.
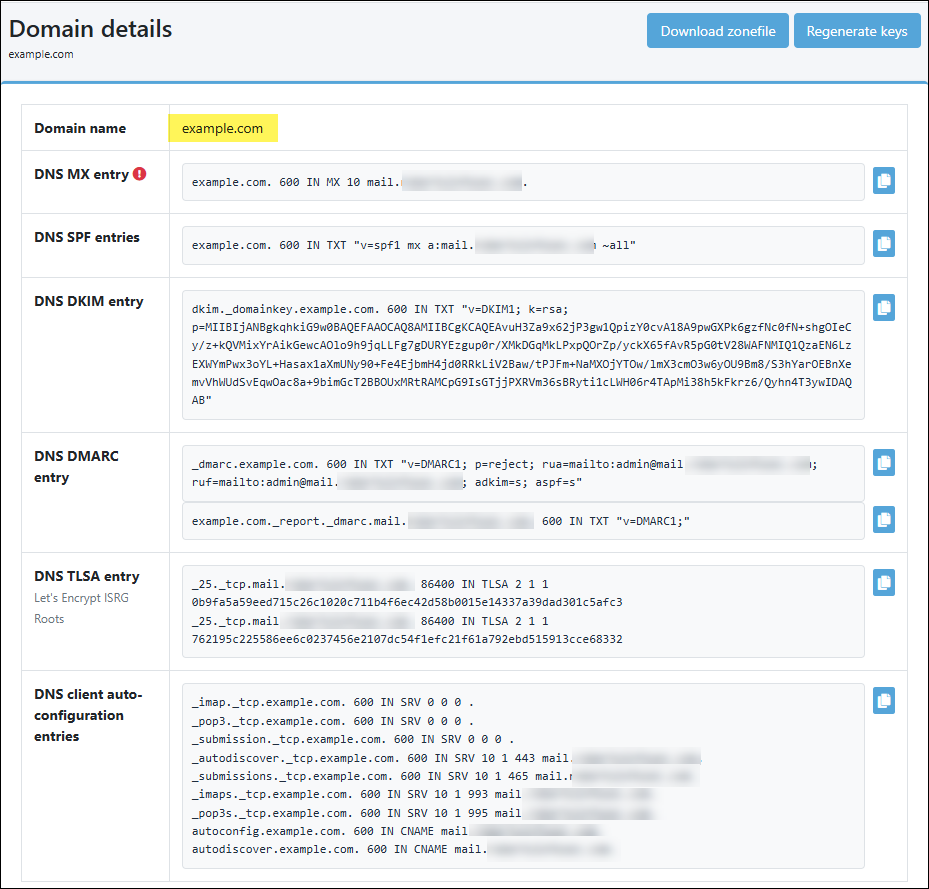
With some DNS providers (like Cloudflare), you can just go to your DNS Records page and "Import" this file and you are done.
If your DNS provider doesn't support this, you may have to just manually copy/paste the records into your DNS provider's interface.
Adding Users to Your Domain
With the email domain in place and the DNS records configured, let's add our first mailbox. From that same "Mail Domains" page, click on the "Users" icon:

Click on "Add User" in the top right corner:
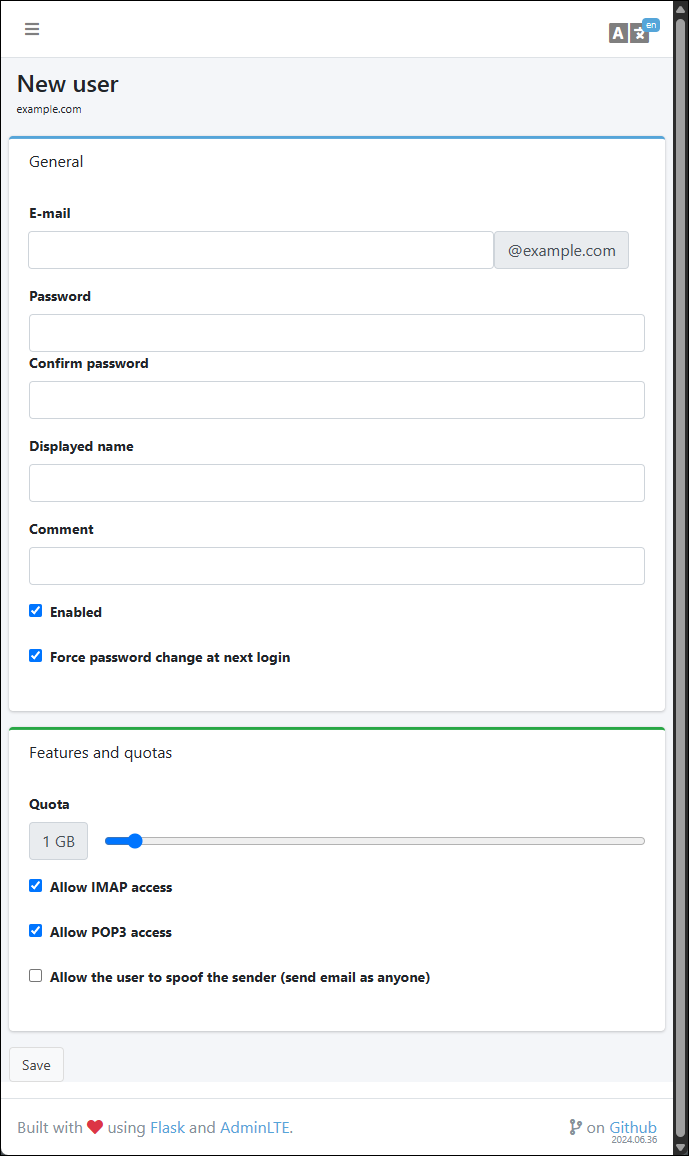
Fill in the details for this user, including setting the initial password. Consider generating a strong password for this user. You can also set the quota for this user, which is the maximum amount of email they can store in their mailbox. This is a good way to limit the size of your email server.
Set Up Forwarding
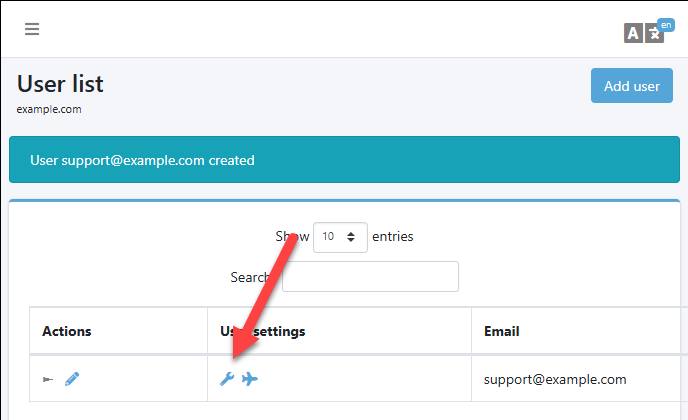
One thing you probably want to do is establish forwarding for this user. That is, when a message comes in for this one contact or support mailbox, you can forward it on to a personal email address of yours - just so you know that there is an email there. For that, from the "Users" screen of the selected "Mail Domain", click the user Settings icon:
You can just do something like this:
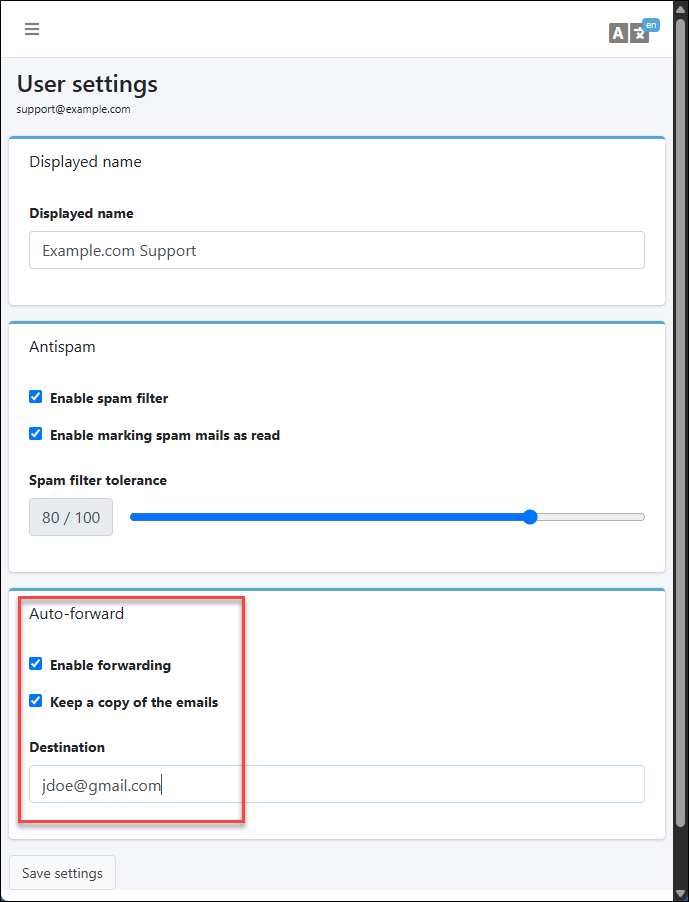
Now, when an email comes in for this mailbox, you will get a copy of it at your personal email address. Then, you can log into the Mailu webmail interface and respond to it from there, for example.
Setting Up a Catch-All Email Address
Next, you may want to set up a catch-all email address. That means that if someone sends an email to [email protected] or [email protected] or [email protected] or any other mailbox that doesn't exist, it will still get delivered to a specific mailbox. If you do want something like that, then back from the Mail Domains screen, click on the "Aliases" icon:
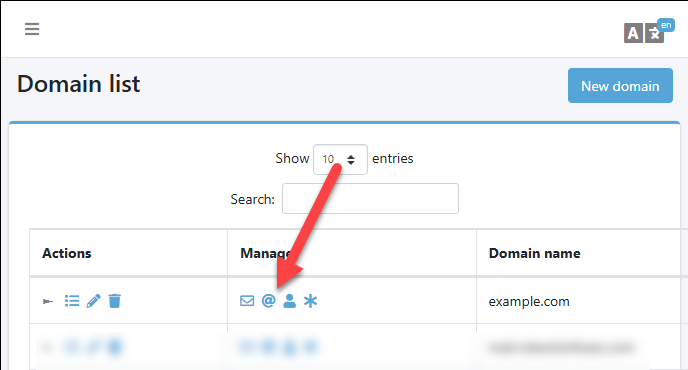
Click on "Add Alias" in the top right corner:
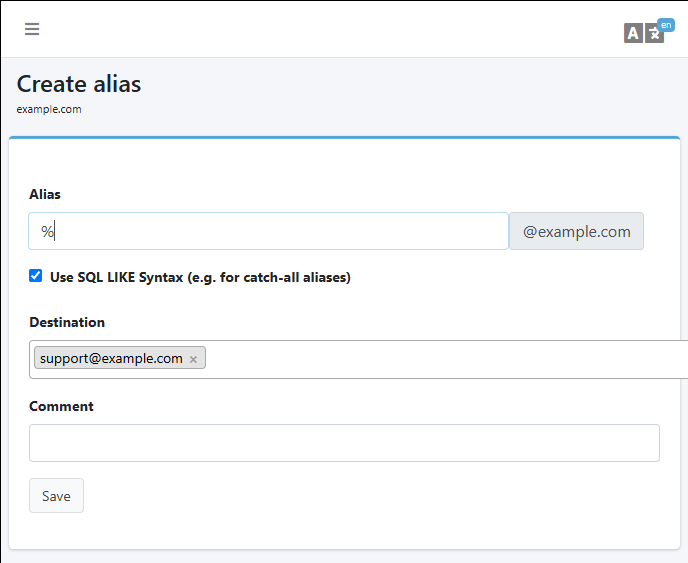
Then, just fill out this form just like this. Use a % in the "Alias" field, be sure to check the "Use SQL LIKE Syntax" checkbox, and then choose the mailbox that you want to "catch" all of the emails for that domain. In this case [email protected].
Setting up Email Clients
If you have DNS records for autodiscover and autoconfig, then most email clients will automatically configure themselves. Meaning, when you are using a desktop, tablet, or mobile mail app, when you put in your email address of like [email protected], modern clients will reach out to autodiscover.example.com and autoconfig.example.com to get the settings they need to configure themselves. If you don't have those DNS records, you can always just manually configure them.
Note that in the Mailu webmail interface, on the left side navigation, there is a "Client Setup" tab that has all of your SMTP, IMAP, and POP3 settings - which are all specific to your mailbox and domain. You can use that to configure your email client manually if you need to.

Summary
We've come a long way in this three-part series on self-hosted domain email.
The Complexity of Email: If you've been following along, or even just skimming, do you see how ridiculously complex email is? What blows my mind is this is already very complex, and that is with a really well-made product like Mailu.
What I mean is, we never even got into the guts of how email works! Mailu abstracts away another dimension of complexity related to customizing SMTP, IMAP, and POP3 servers. Each of those has it's own set of deep, esoteric complexities. Without Mailu (or some other pay platform), it would truly be a nightmare to set all of this up, and then delve into the rabbit holes of the mail deliverability game. I don't know how anyone does it without a team of engineers and a lot of time to spare.
Let's recap what we've accomplished:
-
In Part 1: Why is Email So Hard?, we explored the historical context and technical complexities that make email self-hosting challenging. We learned about the core protocols (SMTP, IMAP, POP3) and the critical anti-spam technologies (SPF, DKIM, DMARC) that are essential for deliverability.
-
In Part 2: Mailu Installation and Hardening, we set up a secure Docker-based email server using Mailu, configured the
ufwfirewall rules andfail2banIDS/IPS for protection against brute force attacks. -
And now in Part 3, we've brought it all together by configuring actual domains, setting up users, and implementing catch-all addresses to make our email server fully functional.
The beauty of this setup is its scalability and cost-effectiveness. Whether you have 2 domains or 20, there is essentially no cost to adding additional domains or additional users. Compare that to the typical $5 per user, per month charged by commercial providers, and the savings become substantial over time for a hobbyist or someone with a lot of domains.
Maintenance Considerations
Self-hosting your email does come with ongoing responsibilities:
- Regular Updates: Keep your server, Docker, and Mailu updated to address security vulnerabilities and bugs.
- Backups: Implement a regular backup strategy for your email data.
- Monitoring: Keep an eye on server resources and email deliverability.
- Security: Periodically review logs for suspicious activity and ensure your firewall rules remain effective.
For enhanced security, consider reviewing the post on Setting Up a Public VPS and what we did with Mailu with Exposing Docker Compose Logs for IDS/IPS to integrate the email server logs with security monitoring tools.
When Self-Hosting Might Not Be Right For You
While self-hosting works great for hobby projects and personal domains, it might not be suitable for everyone:
- Business-Critical Communications: If email is mission-critical for your business, you might be better served by a commercial provider with dedicated support.
- Limited Technical Experience: This setup requires ongoing maintenance and troubleshooting that might be challenging without a technical background.
- Temporary Projects: For short-lived projects, the setup time might not justify the cost savings.
This is definitely the harder route to go. If it's in the budget and/or if you have a domain that is a Profit Center (as opposed to a Cost Center), it's far easier to just pay for a service like Google Workspace or Microsoft 365. They have the resources to do this right, and they have the teams to keep it running. If you are a small business, you probably want to go that route.
Final Thoughts
Setting up your own email server is a journey that teaches you a tremendous amount about how email actually works. It gives you complete control over your communications and frees you from the recurring costs of commercial providers. Plus, there's a certain satisfaction in knowing that you've mastered one of the internet's most fundamental yet complex services. For me, this solves an annoying problem I had and I found this to be quite a challenging and fun project to work on!