Self-Hosted Domain Email Part 2: Mailu Installation and Hardening
Learn how to install and secure your own multi-domain email server using Mailu, Docker, and fail2ban. This step-by-step guide walks you through VPS selection, configuration generation, firewall setup, and security hardening to create a cost-effective alternative to commercial email hosting.
Overview
In Part 1, we explored why email is surprisingly complex despite its deceptively simple beginnings. Now it's time to roll up our sleeves and build our own multi-domain email server using Mailu, a fantastic Dockerized mail server suite.
This guide assumes you're an IT hobbyist with multiple domains who wants to avoid the typical $5/month/domain costs of commercial email hosting. By the end of this post, you'll have set up a secure, functional mail server that can handle multiple domains with proper security hardening.
TL;DR
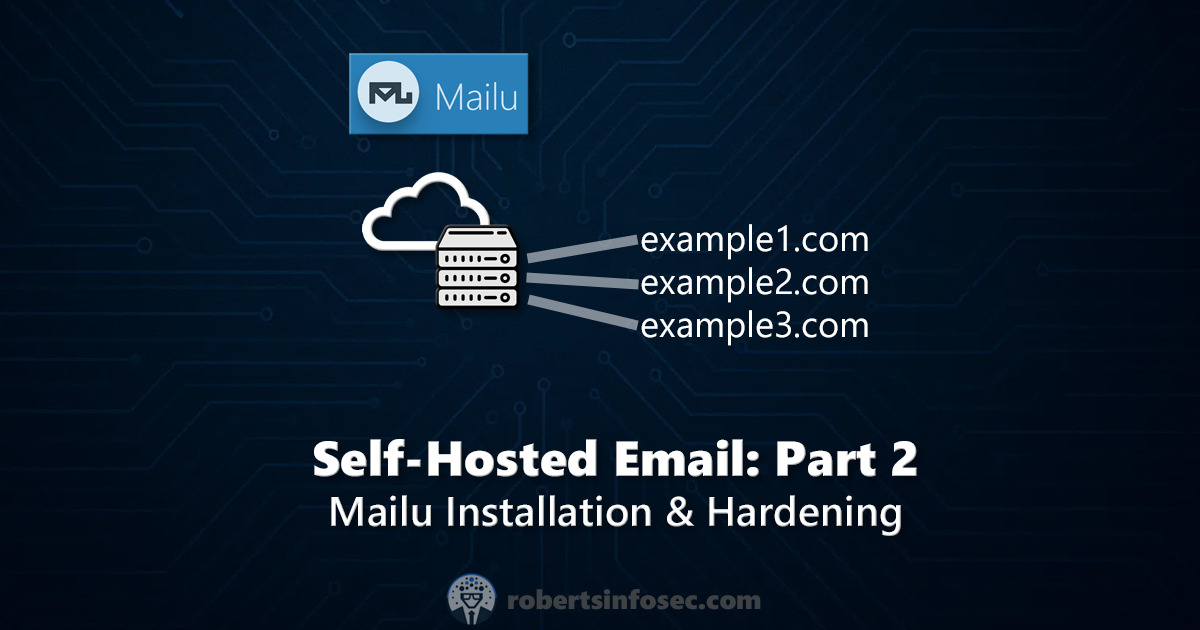
This guide walks you through setting up Mailu on a VPS, configuring it securely with Docker, hardening it with fail2ban and a proper firewall, and setting up the necessary DNS records. You'll end up with a multi-domain email server at a small recurring monthly cost for unlimited* domains and unlimited* users within each domain. This includes webmail access and admin interfaces.
Heads up: This post contains some affiliate links. If you buy something through them, I might earn a small commission - at no extra cost to you. I only recommend tools I've actually used or vetted.
Prerequisites
Before we start, you'll need:
- A domain name you want to use for email (we'll use
example.comthroughout this guide) - Basic familiarity with Linux command line and SSH
- Access to manage your domain's DNS records (we'll use Cloudflare in this guide)
- A few hours of time (most of which is waiting for DNS to propagate)
1: Choosing the Right VPS
Not all VPS providers are suitable for hosting email. The provider must:
- Allow outbound traffic on port 25 (many cloud providers block this)
- Provide IPs with good reputation (not previously used for spam)
- Allow you to set reverse DNS (PTR) records
Once you've purchased your VPS, make sure to:
- Set a strong root password
- Note your server's IP address
- Request a PTR record setup (contact support to set
mail.yourdomain.comas the reverse DNS for your IP)
DNS
PTRRecords: When you send an e-mail, it will have the host that sent the message, but also the IP address. So, part of the anti-spam effort is to do a reverse DNS lookup on the IP address to see if it matches the host that sent the message. And more specifically if it matches the DNS SPF record. That is, if the IP address is allowed to send e-mail for that domain.Meaning, if you don't have a
PTRrecord set up, your email will be marked as spam by most providers. This is because it looks like an unauthorized third party is sending email from your domain.Most VPS providers allow you to set your reverse DNS through their control panel or by submitting a support ticket. This is critical for email deliverability - don't skip it!
1.1: Big Tech IaaS Providers
If you need a mail server setup for a legitimate business, you probably want to use a Big Tech IaaS provider. However, there are limited options:
| Provider | Email Ports Blocked? | Unblock Possible? |
|---|---|---|
| AWS | ❌ Yes | ✅ Yes (via request) |
| Azure | ❌ Yes | ⚠️ No (Enterprise customers only) |
| Google Cloud | ❌ Yes | ❌ No |
| Oracle Cloud | ❌ Yes | ❌ No |
| Alibaba Cloud | ❌ Yes | ❌ No |
| IBM Cloud | ❌ Yes | ❌ No |
1.2: Small IaaS Providers
Many of the smaller providers also block port 25 and other email ports by default, but you can get them unblocked by just opening a ticket with the support team.
This also is a mixed blessing. On the one hand, you can host your mail server. On the other hand, these are often the same services that spammers use, which means your IP address may be on a blocklist. This can lead to your emails being marked as spam or rejected outright.
| Provider | Email Ports Blocked? | Unblock Possible? |
|---|---|---|
| DigitalOcean | ❌ Yes | ❌ No |
| Vultr | ❌ Yes | ❌ No |
| Linode | ❌ Yes | ✅ Yes (via request) |
| Heroku | ❌ Yes | ❌ No |
| RackNerd | ✅ No | ✅ N/A |
| BuyVM | ❌ Yes | ✅ Yes (via request) |
| Hetzner | ❌ Yes | ✅ Yes (after verification) |
| UpCloud | ❌ Yes | ✅ Yes (via request) |
1.3: Example VPS Setup
I've had good experience with Racknerd, which offers affordable VPS plans that you can easily use for email. For a multi-domain email server, I recommend something like this:
- 4GB RAM
- 2-4 CPU cores
- 80-100GB SSD storage
- Debian or Ubuntu OS
WARNING: Hopefully you can see what a closed system internet e-mail is. Basically, the main email providers own everyone's email, and if you want to host your own, all of the cloud providers make it pretty unwelcoming.
With that said, although Racknerd is a very good, very inexpensive VPS provider, they have entire subnets that are on blocklists. You can request a new IP address, but that may not solve the issue. So, for my hobbyist domain emails, I can send e-mails to ProtonMail, external companies and also Gmail, but at the moment Outlook rejects all of my emails for example.
Again, if you need this for a business, you should probably use a Big Tech IaaS provider. Over time, as my IP address and domain names get more reputation, I will eventually be able to send emails to Outlook and everyone else.
2: Basic Server Setup
We'll start with a clean Debian/Ubuntu server and prepare it for hosting our mail services.
2.1: Connect to Your Server
First, connect to your server via SSH:
1
ssh root@your_server_ip
The credentials will be either available via your VPS provider dashboard or they may send you the initial password in your welcome email.
2.2: Follow the Basic Setup Guide
Rather than repeating the entire server setup process, follow this guide: Setting up a Public VPS which will get you into a decent starting place. Not a fully-hardened server, but definitely better than default. This guide covers:
- Creating a non-root user with sudo privileges
- Basic security configurations
- Setting up SSH key authentication
- Installing essential packages
- Configuring automatic updates
At minimum, make sure you've:
- Created a non-root user with sudo
- Set up SSH key authentication
- Configured basic firewall with UFW (we'll add more rules later)
- Installed Docker and Docker Compose
3: Planning Your Server Name Structure
Before generating our Mailu configuration, we need to decide on our server naming scheme.
3.1: Domain Structure
You'll want at least two subdomains for your mail server:
mail.example.com- Main mail server hostname- Used for SMTP, IMAP, and POP3
- Email clients will use
autodiscoverandautoconfig, which are DNSCNAMErecords for this hostname to automatically configure email clients
webmail.example.com- Webmail and admin interface
These subdomains will be used in your DNS configuration and for accessing your mail services. The current version of Mailu will handle certificate generation automatically, so we don't need to set up certificates manually.
Make sure to decide on your domain structure before proceeding to the configuration step. Using consistent and descriptive subdomains will help with organization and access control.
3.1.1: Create DNS Records
Create DNS records for these hostnames in your DNS provider's control panel:
- An
Arecord formail.example.compointing to your server's public IP. - A
CNAMErecord forwebmail.example.compointing tomail.example.com.
Cloudflare Note: If you are using Cloudflare, make sure to set the DNS record for
mail.example.comto DNS only (grey cloud) and not proxied (orange cloud). Email services require direct access to your server. Sincewebmail.example.comwill only be used for the webmail interface, you can keep it proxied (orange cloud) for added security.
4: Generate Your Mailu Configuration
Mailu provides a fantastic setup tool at setup.mailu.io that will generate the necessary configuration files.
4.1: Generate Config
Visit setup.mailu.io to access the configuration tool.
4.2: Complete the setup form
Fill in the setup form with your specific details. The Mailu configuration wizard is divided into several steps:
- Step 1 - Initial configuration
- Version: Select the latest stable release (2024.06 as shown in the screenshot)
- Mailu storage path: Set to
/opt/mailu - Main mail domain and server display name: Your primary domain (e.g.,
example.com) - Postmaster local part: Usually
admin(this creates [email protected]) - TLS certificate handling: Choose
letsencryptfor automatic certificate management - Authentication rate limits: Set appropriate limits (5 attempts per hour is the default)
- Website name: Can leave as "Mailu" or customize
- Admin UI: Make sure it's enabled
- Step 2 - Pick some features
- Webmail client: Choose "Roundcube" (more user-friendly) or "Rainloop"
- Antivirus: Enable ClamAV to scan for viruses in emails
- Webdav service: Enable if you need calendar/contacts sync
- Email client setup: Enable automatic email client configuration
- Step 3 - Expose Mailu to the world
- Public hostnames: Set your public-facing domains:
- Main hostname:
mail.example.com - Webmail hostname:
webmail.example.com - Autodiscover hostname:
autodiscover.example.com
- Main hostname:
- IPv4 listen address: Your server's public IP address
- Subnet of the docker network: Usually keep the default
- Public hostnames: Set your public-facing domains:
The screenshot shows the configuration interface with these options filled in for the fictional example.com domain.
As a reference, here is a realistic example for the fictional example.com domain:

Once you click "Setup Mailu", it will give you a summary of your specific configuration (note the GUID in the URL). Here is a realistic example of what it shows you:

4.3: Implement the Configuration
As you can see from the example, above, you'll have a summary of configuration that is specific to your mail server. Just follow those instructions.
4.4: Modify the Configuration (If Needed)
If you need to adjust any settings, edit the mailu.env file:
1
sudo nano /opt/mailu/mailu.env
Note: The
mailu.envfile contains all the configuration settings for your Mailu instance. Many of the settings need to be adjusted by re-running the setup tool. There will be a comment in the file indicating which settings are auto-generated and which can be modified.
You may want to update these settings:
- Confirm your domains and hostnames are correct
- Check that the TLS configuration is set to
letsencrypt - Verify storage paths and resource limits
Save and exit the editor when you're satisfied with the configuration.
4.5: Working with Docker Compose
While you are in the /opt/mailu directory, you work with that service stack with a few commands. Here are the most common ones:
1
2
3
4
5
6
7
8
9
10
11
12
13
14
# Start the Mailu stack
sudo docker compose up -d

# Stop the Mailu stack
sudo docker compose down

# View the logs for all services
sudo docker compose logs

# View the logs for a specific service
sudo docker compose logs <service_name>

# View the status of all services
sudo docker compose ps
Be Patient!: When you run
docker compose upnot only can it take a minute to pull down the various container images, it also takes a minute for all of the services to stand up. So give it a minute or up to two minutes before the web interface is available.You can run
docker compose logs -fto "follow" the logs. In other words watch all of the container logs as they are being generated. This is a good way to see if there are any errors or issues with the containers. Use CTRL+C to stop the logs.
5: Configure Firewall
In the Setting up a Public VPS guide, we set up a basic firewall using Uncomplicated Firewall (UFW) and opened just a few ports (e.g. 22, 80, and 443). Now we need to add specific rules for Mailu.
Email servers require several ports to be open. Here's how to configure UFW:
1
2
3
4
5
6
7
8
9
10
11
12
13
14
15
16
17
18
19
20
# SMTP (both incoming and outgoing mail) and Sieve
sudo ufw allow 25/tcp
sudo ufw allow 4190/tcp

# Submission ports (for email clients to send mail)
sudo ufw allow 587/tcp
sudo ufw allow 465/tcp

# IMAP and POP3 (for email clients to receive mail)
sudo ufw allow 143/tcp
sudo ufw allow 993/tcp
sudo ufw allow 110/tcp
sudo ufw allow 995/tcp

# HTTP(S) for webmail and administration
sudo ufw allow 80/tcp
sudo ufw allow 443/tcp

# Enable the firewall if not already enabled
sudo ufw enable
Verify that the rules were added correctly:
1
sudo ufw status verbose
6: Set Up Fail2ban for Security
Fail2ban helps protect your server from brute force attacks by temporarily banning IP addresses after too many failed attempts.
Important: By default, Docker containers log messages internally. To use Fail2Ban, it needs log files to monitor. This is a little bit involved, so there is a separate post just for that. Please do not skip this step as it's critical for security. Please read:
In that post, that has some Mailu examples. However below, is the complete implementation that we need. So, assuming you've already read and are ready to implement that, here are the rest of the details for our specific Mailu setup.
6.1: Configure Directory for Logs
Create a directory for the logs:
1
2
3
sudo mkdir -p /opt/mailu/log
sudo chown 991:991 /opt/mailu/log   # 991 is often used by Mailu containers (e.g., for postfix/dovecot)
sudo chmod 755 /opt/mailu/log
6.2: Configure Docker Compose Logging
Edit the existing /opt/mailu/docker-compose.yml file to change the logging sections for every service to the following, and to map the volumes mapping for the log directory:
1
2
3
4
5
6
7
    logging:
      driver: syslog
      options:
        syslog-address: "unixgram:///dev/log"
        tag: "mailu-smtp"
    volumes:
      - /dev/log:/dev/log:ro
The tag should match the service name. For example, for the postfix service, it should be mailu-postfix. For the dovecot service, it should be mailu-dovecot, and so on. Or you could name them by function, like mailu-smtp, mailu-imap, etc.
6.3: Create Syslog Router
Create a new file for the syslog router:
1
sudo nano /etc/rsyslog.d/mailu.conf
And that should have the following, assuming you are using the mailu tag and that your logs will be in /opt/mailu/log:
1
2
3
4
5
6
7
8
9
10
11
12
13
14
15
16
###############################################################################
# /etc/rsyslog.d/mailu.conf
#
# Dynamically route any SYSLOG_IDENTIFIER starting with "mailu-" into
# /opt/mailu/logs/mailu-<service>.log
###############################################################################

# Use the built-in file format (optional, but recommended)
$ActionFileDefaultTemplate RSYSLOG_FileFormat

# Define a template that writes to /opt/mailu/logs/<programname>.log
$template MailuLogFile,"/opt/mailu/logs/%programname%.log"

# If the program name begins with "mailu-", write to the dynamic file
if ($programname startswith 'mailu-') then -?MailuLogFile
& stop
6.4: Restart Everything
Then restart rsyslog to apply the changes:
1
sudo systemctl restart rsyslog.service
And restart the Mailu stack to apply the new logging configuration:
1
2
3
cd /opt/mailu
sudo docker compose down
sudo docker compose up -d
You should now see logs being written to /opt/mailu/logs/<service>.log for each service. For example:
1
2
3
4
5
6
7
8
9
10
11
-rw-r----- 1 syslog adm  4400 May 10 16:11 mailu-admin.log
-rw-r----- 1 syslog adm 73348 May 10 16:16 mailu-antispam.log
-rw-r----- 1 syslog adm  1573 May 10 16:10 mailu-antivirus.log
-rw-r----- 1 syslog adm 30091 May 10 16:11 mailu-front.log
-rw-r----- 1 syslog adm     0 May 10 14:06 mailu-imap.log
-rw-r----- 1 syslog adm     0 May 10 14:06 mailu-oletools.log
-rw-r----- 1 syslog adm  1270 May 10 15:40 mailu-redis.log
-rw-r----- 1 syslog adm     0 May 10 14:06 mailu-resolver.log
-rw-r----- 1 syslog adm     0 May 10 14:06 mailu-smtp.log
-rw-r----- 1 syslog adm     0 May 10 14:06 mailu-tika.log
-rw-r----- 1 syslog adm     0 May 10 14:06 mailu-webmail.log
6.5: Create Fail2Ban Filters
A Fail2Ban filter is a set of rules that defines what to look for in the logs. We need to create a filter for each service to define what constitutes a failed login attempt.
6.5.1: Filter for Mailu Web Interface
There are several existing filters in place for the other mail services, but we need to create a custom filter for the Mailu web interface Create a filter for Mailu Web Interface (used by the admin and webmail interfaces):
1
sudo nano /etc/fail2ban/filter.d/mailu-web.conf
Add the following content:
1
2
3
[Definition]
failregex = ^.*Failed login for .* from <HOST>.*$
ignoreregex =
6.6: Create a Fail2ban Configuration for Mailu
Create a custom jail configuration for Postfix and Dovecot:
1
sudo nano /etc/fail2ban/jail.d/mailu.conf
Add the following configuration:
1
2
3
4
5
6
7
8
9
10
11
12
13
14
15
16
17
18
19
20
21
22
23
24
25
26
27
28
29
30
31
32
33
34
35
36
37
38
39
40
41
42
43
44
[postfix]
enabled = true
port = smtp,submission,465
filter = postfix
logpath = /opt/mailu/log/postfix.log
maxretry = 5
findtime = 600
bantime = 3600

[dovecot]
enabled = true
port = imap,imaps,pop3,pop3s
filter = dovecot
logpath = /opt/mailu/log/dovecot.log
maxretry = 5
findtime = 600
bantime = 3600

[roundcube-auth]
enabled = true
port = http,https
filter = roundcube-auth
logpath = /opt/mailu/log/roundcube.log
maxretry = 5
findtime = 600
bantime = 3600

[mailu-admin]
enabled = true
filter = mailu-web
port = http,https
logpath = /opt/mailu/log/admin.log
maxretry = 5
findtime = 600
bantime = 3600

[mailu-front]
enabled = true
filter = mailu-web
port = http,https
logpath = /opt/mailu/log/nginx/access.log
maxretry = 5
findtime = 600
bantime = 3600
6.7: Restart Fail2ban to Apply Changes
1
sudo systemctl restart fail2ban
You can also check the status of Fail2ban to ensure it's running correctly:
1
sudo systemctl status fail2ban
If it can't find the log files that the config points it, the service will fail to start.
6.8: Implement Log Rotation
Again, I'm just recapping what is over in that other post
To prevent the logs from growing indefinitely, we need to set up log rotation. Create a new logrotate configuration file:
1
sudo nano /etc/logrotate.d/mailu-logs
Add the following configuration:
1
2
3
4
5
6
7
8
9
10
11
12
13
14
15
16
17
18
19
20
21
22
23
24
25
/opt/mailu/logs/mailu-*.log {
    # Rotate the log files every day
    daily

    # Keep 14 rotated logs before deleting the oldest
    rotate 14

    # Compress old log files to save space
    compress

    # Skip compression for the most recent rotated log; compress it on the next run
    delaycompress

    # If a log file is missing, go on without error
    missingok

    # Do not rotate the file if it is empty
    notifempty

    # After copying the current log, truncate it in place so the service can continue writing
    copytruncate

    # After rotation, create a new log file with these permissions and ownership
    create 640 syslog adm
}
6.8.1: Restart and Test Log Rotation
Restart the logrotate service:
1
sudo systemctl restart logrotate.service
You can test the log rotation configuration by running:
1
sudo logrotate -f /etc/logrotate.d/mailu-logs
This will force logrotate to run and apply the configuration. Check the /opt/mailu/logs/ directory to see if the logs have been rotated correctly. If you had a mailu-smtp.log file before, you should now see a mailu-smtp.log.1 file and a new mailu-smtp.log file.
7: Start Mailu
If you haven't already, now we're ready to start our mail server:
1
2
cd /opt/mailu
sudo docker compose up -d
This will pull all the necessary Docker images and start the Mailu services. The first startup may take several minutes as the images are downloaded and initialized.
7.1: Check the Status
Verify that all containers are running:
1
sudo docker compose ps
All services should be "Up" and healthy. If any service shows an error, check its logs:
1
sudo docker compose logs <service_name>
8: Configure DNS Records
You should now be able to access the Mailu web interface at https://webmail.example.com. However, before you can send or receive emails, you need to configure your DNS records.
Tip: You can create your
adminaccount using the directions from the Mailu setup tool. Note that you would change the domain name and theadminname to whatever you want. Choose a very strong password and make sure to save it somewhere safe.

In the left navigation if you go into "Mail Domains", click on the Details icon for your domain. That will bring you to a URL like this: https://webmail.example.com/admin/domain/details/example.com. That will show you a screen like this where you should generate your keys, and then Download Zonefile (which you will need for DNS).
Log in to your DNS provider's control panel, select your domain, and navigate to the DNS records section. Providers like Cloudflare let you "Import" a native Bind-format zonefile like this, which makes this super simple.
8.1: Using the Downloaded Zonefile
This zonefile contains all the necessary DNS records formatted for easy implementation. The file will look something like this:
1
2
3
4
5
6
7
8
9
10
11
12
13
14
15
16
17
18
19
20
21
22
23
24
25
26
27
28
; Zone file for example.com
; Mailu managed zone

; A records for the server
mail                  IN A      203.0.113.1
webmail               IN A      203.0.113.1

; MX records for mail delivery
@                     IN MX     10 mail.example.com.

; SPF record for sender validation
@                     IN TXT    "v=spf1 mx -all"

; DKIM record for cryptographic authentication
dkim._domainkey       IN TXT    "v=DKIM1; k=rsa; p=MIIBIjANB..."

; DMARC record for reporting and policy
_dmarc                IN TXT    "v=DMARC1; p=reject; rua=mailto:[email protected]"

; SRV records for client auto-discovery
_imap._tcp            IN SRV    0 1 143 mail.example.com.
_imaps._tcp           IN SRV    0 1 993 mail.example.com.
_submission._tcp      IN SRV    0 1 587 mail.example.com.
_submissions._tcp     IN SRV    0 1 465 mail.example.com.

; Auto-discovery for mail clients
autoconfig            IN CNAME  mail.example.com.
autodiscover          IN CNAME  mail.example.com.
If you can't import the file, you will have to manually add each of these records to your DNS provider.
8.2: Essential DNS Records To Add
If you prefer to add the records manually, here are the essential records you need:
- A records:
mail.example.compointing to your server IPwebmail.example.compointing to your server IP
- MX record:
- Priority: 10
- Target:
mail.example.com
- SPF record (TXT):
- Host:
@(root domain) - Value:
v=spf1 mx -all
- Host:
- DKIM record (TXT):
- Host:
dkim._domainkey - Value: (copy from the zonefile, it's a long string)
- Host:
- DMARC record (TXT):
- Host:
_dmarc - Value:
v=DMARC1; p=reject; rua=mailto:[email protected]
- Host:
- SRV records for client auto-discovery:
- Service:
_imap._tcpPriority: 0, Weight: 1, Port: 143, Target:mail.example.com - Service:
_imaps._tcpPriority: 0, Weight: 1, Port: 993, Target:mail.example.com - Service:
_submission._tcpPriority: 0, Weight: 1, Port: 587, Target:mail.example.com - Service:
_submissions._tcpPriority: 0, Weight: 1, Port: 465, Target:mail.example.com
- Service:
- Autoconfig/Autodiscover (CNAME):
autoconfigpointing tomail.example.comautodiscoverpointing tomail.example.com
Critical: Make sure to set all email-related DNS records as DNS only (grey cloud in Cloudflare) and NOT proxied (orange cloud). Meaning, if your DNS provider offers Web Application Firewall (WAF) protections, those should be disabled for email. Email requires direct connection to your server.
9: Test Your Installation
Once all services are running and DNS records have propagated (which can take up to 24-48 hours), let's test our installation:
9.1: Web Admin Interface
- Visit
https://webmail.example.com/admin - Log in with the admin credentials you set during configuration
- Explore the admin interface and verify you can access all features
By default, it will have created a mail domain for mail.example.com. However, you probably want something like [email protected]. So, navigate into "Mail Domains" and add that domain. Once that domain is created you can add users from there.
9.2: Create a Test User
In the admin interface:
- Navigate to "Users"
- Click "Add user"
- Create a test user with your desired username and password
9.3: Test Email Reception
Send an email from an external account (like Gmail) to your new email address (e.g., [email protected]). Then check if it was received by:
- Visiting
https://webmail.example.com/and logging in with your test account - Verifying that the email appears in the inbox
9.4: Test Email Sending
Try sending an email from your new account to an external address (like your Gmail). Check if:
- The email arrives
- It passes SPF, DKIM, and DMARC checks (this will be visible in Gmail by checking the email headers)
- It doesn't end up in spam
9.5: Test DNS Configuration
Use the following services to verify your DNS setup:
- MX Toolbox - Check MX, SPF, DKIM, and blacklist status
- mail-tester.com - Send an email and get a detailed deliverability report
10: Server Hardening and Maintenance
With your mail server running, consider these additional hardening steps:
10.1: Set Up Regular Backups
Create a simple backup script:
1
sudo nano /etc/cron.daily/backup-mailu
Add the following script:
1
2
3
4
5
6
7
8
9
10
11
12
13
14
15
16
17
18
19
#!/bin/bash
BACKUP_DIR="/var/backups/mailu"
DATE=$(date +%Y%m%d)

# Create backup directory if it doesn't exist
mkdir -p $BACKUP_DIR

# Stop Mailu temporarily for consistent backup
cd /opt/mailu
docker compose down

# Backup the data directory
tar -czf $BACKUP_DIR/mailu-data-$DATE.tar.gz /opt/mailu

# Restart Mailu
docker compose up -d

# Remove backups older than 7 days
find $BACKUP_DIR -name "mailu-data-*.tar.gz" -mtime +7 -delete
Make the script executable:
1
sudo chmod +x /etc/cron.daily/backup-mailu
10.2: Set Up Certificate Auto-Renewal
Since we're using Mailu's built-in Let's Encrypt support, certificates will be automatically renewed. However, we still want to create a renewal check script:
1
sudo nano /etc/cron.weekly/check-mailu-certs
Add the following script:
1
2
3
4
#!/bin/bash
# Check Mailu container status and restart if needed
cd /opt/mailu
docker compose ps | grep -q "Exit" && docker compose restart
Make it executable:
1
sudo chmod +x /etc/cron.weekly/check-mailu-certs
10.3: Monitor Disk Space
Set up a simple disk space alert:
1
sudo nano /etc/cron.daily/check-disk-space
Add this script:
1
2
3
4
5
6
7
8
9
#!/bin/bash
THRESHOLD=90
ADMIN_EMAIL="[email protected]"

DISK_USAGE=$(df -h / | grep / | awk '{print $5}' | cut -d'%' -f1)

if [ "$DISK_USAGE" -gt "$THRESHOLD" ]; then
    echo "Warning: Disk usage is at $DISK_USAGE%" | mail -s "High Disk Usage on Mail Server" $ADMIN_EMAIL
fi
Make it executable:
1
sudo chmod +x /etc/cron.daily/check-disk-space
Final Checklist
Here's a quick summary of everything we've done to get our self-hosted email server up and running:
Server Setup
- Selected a suitable VPS provider that allows port 25 and PTR records
- Set up a VPS with at least 4GB RAM and 80GB storage
- Configured PTR record for the server IP (reverse DNS)
- Created a non-root user with sudo privileges
- Set up SSH key authentication
- Installed Docker and Docker Compose
- Installed additional packages (curl, git, fail2ban, ufw)
Mail Server Configuration
- Planned server domain structure (
mail.example.com,webmail.example.com) - Generated Mailu configuration using setup.mailu.io
- Downloaded configuration files (mailu.env, docker compose.yml, zonefile)
- Created Mailu directory structure in
/opt/mailu - Transferred and configured necessary files
- Modified configuration settings as needed
Security Components
- Configured firewall (UFW) with appropriate mail ports
- Set up Fail2Ban for brute force protection (including Docker log integration and jail configurations)
- Created custom Fail2Ban filter for web interfaces (
mailu-web.conf) - Enabled SSL/TLS with Let's Encrypt (via Mailu setup)
- Implemented log rotation for service logs
- Set up automated backup system for Mailu data
- Created certificate renewal and container status check script
- Created disk space monitoring script
DNS Configuration
- Added A records for mail and webmail subdomains
- Configured MX record pointing to mail server
- Set up SPF record to prevent email spoofing
- Added DKIM record for email authentication
- Configured DMARC record for reporting and policy
- Added SRV records for client auto-discovery
- Set CNAME records for autoconfig and autodiscover
- Ensured all mail records are not proxied through Cloudflare
Testing & Verification
- Verified all containers are running properly
- Tested admin interface access
- Created and tested a user account
- Tested email reception from external providers
- Tested email sending to external providers
- Verified SPF, DKIM, and DMARC are working
- Used external testing tools (MX Toolbox, mail-tester.com)
If you've completed all these steps, you should have a fully functional, secure multi-domain email server! If you run into any issues, double-check the corresponding section in this guide for more detailed instructions.
Summary
You should now have a fully functional, secure, and properly configured email server that supports multiple domains and users. This is now a simple and cost-effective way to handle custom domain e-mail for future projects.
In Part 3, we'll explore how to:
- Add multiple domains to your Mailu instance
- Set up catch-all addresses
- Create aliases and redirections
- Configure advanced features like spam filtering levels
- Monitor and troubleshoot common issues
- Set up mobile clients and desktop email applications
Further Reading / References
- Mailu Documentation
- Docker Compose Documentation
- Let's Encrypt Documentation
- Fail2ban Documentation
- MX Toolbox - Essential tool for email server testing
- mail-tester.com - Test your email deliverability